Monday, October 20, 2008

Buffalo Chicken Pasta

Jim is away on travel this week, so I'm making some meals that I love that easily serve one. This one satiates my desire for something spicy and creamy.

Ingredients:
  • 3-4 oz. chicken
  • 2 oz. bite size pasta (I used whole wheat rotini).
  • 2 Tbsp. hot sauce (I used Frank's Red Hot).
  • 4 Tsp. melted butter
  • 1 1/2 Tbsp. Ranch or Blue Cheese Dressing
  • 1/4 Tsp. Paprika
  • 2 Tbsp. salty cheese, Feta or Parmesan
  1. Boil pasta in salty water - use the cooking time on the box.
  2. Coat chicken with salt and pepper, then grill chicken on a grill pan, electric grill, or grill. I used the thin cut breasts and it took about 2-3 minutes per side. Cut into bite size pieces.
  3. Combine the hot sauce, butter, dressing and paprika in a small bowl.
  4. Mix the dressing mix, chicken and pasta in a large bowl. Top with the cheese.

Tres Leches Cake


For a fun weekend treat, I made Jim one of his favorites, Tres Leches Cake. I mostly followed a recipe from All Recipies.com for Tres Leches Cake, but I did make enough changes that I thought it was worth noting here.

Ingredients:
  • 1 cup white sugar, divided
  • 5 egg yolks
  • 5 egg whites
  • 1/3 cup milk
  • 1 teaspoon vanilla extract
  • 1 cup all-purpose flour
  • 1 1/2 teaspoons baking powder
  • 1 (14 ounce) can sweetened condensed milk
  • 1 (12 fluid ounce) can evaporated milk (I used 2% and it worked fine)
  • 1 pint heavy whipping cream, divided
  • Maraschino cherries
  1. Preheat oven to 350 degrees F. Spray a 9x13 baking pan with non stick cooking spray and flour.
  2. Beat the egg yolks with 3/4 cup sugar until light in color and doubled in volume. Stir in milk, vanilla, flour and baking powder.
  3. In a small bowl, beat egg whites until soft peaks form. Gradually add remaining 1/4 cup sugar. Beat until firm but not dry. Fold egg whites into yolk mixture. I would recommend using the 1/3, 1/3, 1/3 method: 1/3 stir directly in, 1/3 fold in, and 1/3 at the end just barely mixing. Pour into prepared baking pan.
  4. Bake for 45 minutes until toothpick comes out clean. Allow to cool for 10 minutes.
  5. Mix together condensed milk, evaporated milk and 1/4 cup of the whipping cream.
  6. Using a fork, pierce the entire surface of the cake. I gave the fork a quarter-turn as I pulled it out of the cake to ensure maximum perforation.
  7. Pour milk mixture over the cake and refrigerate overnight.
  8. Whip the remaining whipping cream and top the cake with the whipped cream. Garnish with cherries.
Sammy actually does approve of this desert as he got a spoonful of sweetened condensed milk out of the recipe.

Pizza Inspired Appetizer


Jim and I were starving this weekend and salivating over the pizzas in the oven. To satiate the grumbles in our stomachs, I pulled together a quick appetizer with ingredients on hand. I used a few pieces of the fresh mozzarella we used for the pizza, drizzled them with extra virgin olive oil, and topped them with kosher salt, fresh ground pepper, and fresh basil. I then used a little bit of green pepper sauce to dress up the plate a bit.

Saturday, October 18, 2008

Thin Crust Pizza

A while back we made an attempt at doing homemade pizza, following the Alton Brown recipe (show transcript here). Although the results were edible, they weren't very pretty, and we had a lot of trouble getting the pizzas in and out of the oven.

The main problem was that we didn't have a pizza peel. In retrospect, trying to do pizza without one was a mistake, and I wish we had bought one earlier than we did. It's hard to overstate the difference having a peel makes, in terms of not dumping your pizza all over the inside of your oven.

In addition to a pizza peel, the other piece of special equipment you need is either a (fancy, expensive) pizza stone or a bunch of (cheap) unglazed quarry tiles. These go on the very bottom rack of your oven when it's in the lowest position, right over the heating coil. We found 8" square unglazed tiles for less than 50¢ each at Home Depot — six fills one of our oven racks well, while still leaving room for air to circulate.

Although having two basically single-purpose gadgets makes this a fairly equipment-intensive recipe, we thought the results were more than worth it. The procedure borrows both from Alton Brown's “Pizza Pizzas” and 101 Cookbooks' “Best Pizza Dough Ever” recipes. I modified the recipe slightly in order to make it somewhat faster, and to use Active Dry rather than instant yeast.

Dough Ingredients:
  • 1-1/2 c. warm water (~100F)
  • 2 packets Active Dry yeast
  • 4 tbsp. white sugar
  • 4 c. bread flour
  • 1-1/2 tbsp. kosher salt (if using regular table salt, use half)
  • 2 tbsp. olive oil
Pizza Ingredients:
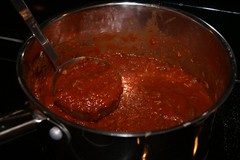
  • 1 c. pizza sauce (see our recipe for Green Pepper Pizza Sauce)
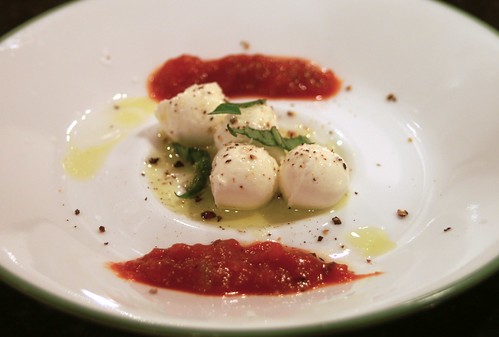
  • 1/2 lb. (8 oz.) fresh mozzarella (the small, 3/4" dia. balls are convenient, sliced in half)
  • Shredded or grated Parmesan or Romano cheese, to taste
  • Fresh basil, to taste
Preparing the Dough:
  1. Bloom the yeast by mixing 2 tbsp. of sugar into the warm water, and then pouring the yeast on top. Set aside momentarily.
  2. Place bread flour, salt, and the other 2 tbsp. sugar into the work bowl of a stand mixer with the paddle blade attached. Combine on low.
  3. Add the olive oil to the liquid, and then slowly pour it into the mixer, forming a sticky dough.
  4. As soon as the dough comes together, stop mixer and swap paddle blade for greased (with pan-release spray) dough hook.
  5. Knead dough using hook for about 15 minutes. Start the mixer slowly (2 or 3 on a KitchenAid) and then work up to a faster speed (4 or 5) as the dough gets smoother and more glutenous. The dough should ‘slap’ against the side of the bowl with each rotation. (Placing a non-skid mat under the mixer prevents it from ‘walking.’)
  6. If after 10 minutes or so of kneading dough still sticks to sides of work bowl, add additional flour by 1/2 tablespoons until it clears. It's okay for dough to still stick to the bottom of the bowl, but it should pull cleanly away from the sides. (We had to add about a tablespoon.)
  7. Test the dough by pulling out a small piece and checking for the ‘windowpane.’ This is where the dough can be stretched thin enough to be translucent, without tearing first. If dough tears, continue kneading and testing in 5-minute increments. Dough should be sticky but not unworkably so; if it's too sticky to stretch, add more flour by 1/2-tablespoonsfuls while kneading.
  8. Turn the dough out into a bowl lightly coated with olive oil. (Alternately, if you're careful, you can do this in the mixer's work bowl by ‘catching’ the dough on the hook, raising it up so it's clear of the bowl, dumping some olive oil in, spreading it around, and then plopping the dough back into the bowl.) Cover with plastic wrap.
  9. Allow dough to rise in room-temperature location for about 4-5 hours. (At this point, the internal temperature of our dough was 86F and the room was 74F.)
  10. When dough has doubled in size, punch down, removing as many bubbles as possible. Allow to rise for a further 2 hours or so.
  11. Turn dough out onto countertop and divide into quarters. Shape each piece into a tight ball. Dough not intended for immediate use should be placed into greased zip-top bags and frozen.
Making the pizzas:
  1. Place pizza stone or quarry tiles on very bottom rack of oven (if using a gas oven without a heating coil, place directly on the bottom surface of the oven). Preheat oven to 500F.
  2. Gently stretch dough pieces into 8" rounds, then allow to rest on floured countertop for about 10-15 minutes. This gives the dough time to relax and prevents tearing.
  3. Stretch dough out to 12" round, dust one side with corn meal, and place (cornmeal side down) on pizza peel. Dough should side around easily on the peel; if not, add more cornmeal to the bottom.
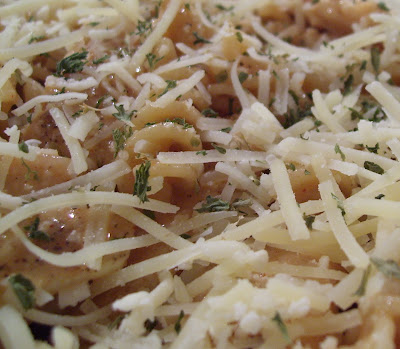
  4. Spread 1/2 c. sauce across the top, then add 4 oz. (half of the 8 oz. container) mozzarella, and as much Parmesan or Romano cheese as desired — but don't overdo it; the pizza will get greasy if you add more than a sprinkle for flavor.
  5. Once the oven is up to temperature, use the peel to place the pizza onto the hot stone/tiles. The only trick here is to never try to ‘push’ the pizza; you'll just make a mess. Instead, let the far end of the pizza slide off until it contacts the stone, and then gently pull the peel out from under it, allowing it to drop.
  6. Cook until crust is brown. It helps if your oven's internal light works, so you can watch the pizza without opening the oven door. In our oven this was about 8 minutes, but be watchful.
  7. Remove pizza using the peel. Depending on the thickness of your peel, you may be able to just slide it under the pizza and remove it, but you may need a little help from a fork to keep from pushing it off the back of the rack.
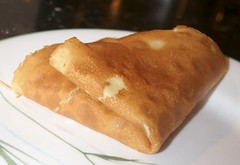
  8. Place pizza onto wire cooling racks, and allow to cool for at least 5 minutes before slicing. If properly cooked, the bottom should be dark brown but not black.
  9. Garnish with chopped fresh basil, if desired.
  10. Serve with beer.
Final Thoughts:

Compared to the original Alton Brown recipe, this version doesn't have quite the perfect chewiness and texture. However, it is significantly faster and can be started the same day you want to eat, rather than the night before. If you have time to let the dough rise for 24 hours, by all means use either of the slower, cold-rising recipes, but if you only have 8 hours, we think this one gets about 80% of the flavor in a third of the time.
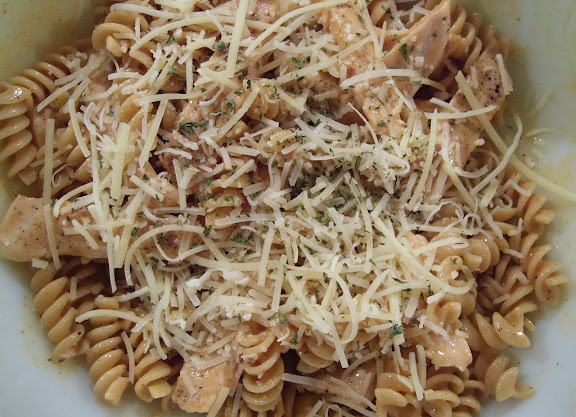
Green Pepper Pizza Sauce

Photo of Sauce in Pan
This is my mom's favorite recipe for pizza sauce -- inspired by the sauce that was served at her high school hangout (I won't mention the year to preserve her modesty). Jim has actually suggested using jarred sauce for making pizza but after my look of abject horror, he quickly backed off of that position. Now he always requests this sauce when we make pizza - luckily it freezes well.

Ingredients:
  • 2-3 cloves of garlic, minced
  • 1 onion, finely chopped
  • 1 green pepper, finely chopped
  • 1 tbsp olive oil
  • 1 6 oz. can tomato paste
  • 1 15 oz. can tomato sauce
  • 2 oz. beer
  • 1 tsp. salt
  • 1 tsp. freshly ground pepper
  • 1/2 tsp. parsley
  • 1 tsp. basil
  1. Chop the onion and the green pepper. I usually use my food processor to help finely chop the veggies.
  2. Mince the garlic (or smash with the side of a big knife, depending on how aggressive you're feeling.) Heat the oil over medium heat and add the garlic until softened (not browned - if the garlic looks brown, you've already burned it).
  3. Add the chopped onion and pepper, lower the heat to low, and cook until softened. (About 3-4 minutes).
  4. Add the tomato paste and mix it with the veggies.
  5. Add the tomato sauce and use the beer to clean the remaining sauce from the can before adding to the pot.
  6. Add the seasonings and let the sauce simmer on low heat.
  7. Taste the sauce to see if additional seasonings are needed. The sauce will develop more and more flavor as it simmers -- let it go at least 30 minutes, but longer is better. Keep an eye on it, stir occasionally, and make sure it does not boil.
I know it seems like I'm adding a lot of tomato paste into the recipe, and that's true. But for pizza you want a thick sauce that is going to stick to your pizza. While it is a lot of paste, it makes for a great consistency pizza sauce.

This makes about 4 1/2 to 5 cups of sauce. The sauce freezes really well, I put small servings in a plastic container, let them cool on the counter (if they are hot when they go into the freezer, the steam from the sauce will form an ice layer on top), and freeze. This makes enough for about 3 meals.

Keep in mind, this post comes from Jane. Jim is the obsessive compulsive one when it comes to measuring things and coming from a big Italian family, we just add spices until it looks/tastes right. I did my best to list the correct amount of spices, but if you taste it and it needs more of any particular flavor, add it in. Depending on the pungency of the onions and garlic, I also occasionally find myself adding a bit of onion or garlic powder as well.

This is a great pizza sauce recipe -- the green pepper gives a great slightly spicy flavor that complements great pizza crust (watch for Jim's blog post shortly). Sammy, however, was unimpressed.

Breakfast Crêpes with Plums


I'd been talking all week about wanting to make crêpes, so when Jim woke up and asked me what I wanted to do today, I naturally gravitated towards the kitchen. After a quick glance at a recipe, I realized we had just enough eggs to make a half batch of dessert crêpes, which are our favorites for breakfast. (Entrée crêpes are a bit more savory than we — especially Jim — tend to like for breakfast.)

Dessert crêpes naturally need something to go in them, so, looking around the fridge, I found four plums, and decided that would have to do. We also had some whipping cream left over from last night's saffron risotto.

I'm still perfecting my crêpe-making technique, so these weren't perfect…but they still tasted darn good.

Equipment:
  1. Crêpe maker — while it's possible to use a small skillet, it's a lot easier to get nice, thin crêpes if you have a dedicated crêpe maker. We have an old, 1970s-era Sunbeam one (thanks, eBay!) with a removable ‘pan,’ which is a significantly better design than modern ones where the cooking surface is not removable.
  2. Blender — we use a blender to mix the batter. A stand mixer with a whisk attachment would probably also work, as would a Cusinart, or doing it by hand with a whisk, but the blender does the trick consistently and quickly.
Ingredients:
  • 3-4 ripe yellow plums
  • 2 eggs
  • 1/2 c. flour
  • 1/4 c. milk
  • 1/4 c. water
  • 1/4 tsp. salt
  • 1 tbsp. butter, melted
  • 2 tsp. white sugar
  • 1 tsp. vanilla extract
Procedure:
  1. Peel and cut 3-4 yellow plums into 1/2" slices, set aside.
  2. Crack both eggs into the blender.
  3. Add milk, water, melted butter, salt, sugar, and vanilla to blender.
  4. Mix until smooth.
  5. Slowly add flour, by tablespoons, to the blender, mixing until smooth between each.
  6. Pour mixture into a pie pan (big enough for the ‘pan’ part of your crêpe maker, if using one) or keep in blender pitcher (if using a skillet). The remainder of these instructions will assume you are using a crêpe maker.
  7. Get the crêpe maker hot, and spray lightly with Pam or other pan-release spray. Wipe off excess with a paper towel.
  8. Carefully dip the hot ‘pan’ into the batter, just enough to coat the top. Remove and place back on base to cook. The first few will probably have a lacy appearance and need to be tossed; this is because of the bubbles in the batter and is normal. Use them to practice your dipping technique.
  9. Use a plastic spatula to turn the crêpe once the bottom has cooked and the edges have started to brown. Cook the opposite side just long enough for the edges to start crinkling in the opposite direction and the sizzling sound stops (very quick!), then remove. The ‘trick’ is to be very gentle when removing and turning, and to free all the edges first before trying to flip.
  10. Place sliced plums on one quarter of the crêpe, fold it in half, then in half again. (This is the most traditional way of folding and serving; you can also put plums on half and then fold only in half once, if you want more fruit in each.)
  11. Top with fresh whipped cream and/or powdered sugar if desired.
Final Thoughts:

These weren't the prettiest crêpes in the world; the edges were a little too crispy to fold neatly, and there was a lot of cracking as a result. In the future, allowing them to cool a little more might give the edges more time to soften, and avoid cracking. The plums, however, were a perfect filling, just sweet enough to stand up to the crêpes without being overwhelming.

If you aren't using a crêpe maker, leave the crêpe mixture in the blender. Heat a small non-stick skillet (an omelette pan would be appropriate) and pour a small amount of the mixture into the skillet while moving the skillet to get the mixture to cover the surface. Follow all other instructions as above.

These tasted quite good, but we need to work on the pretty quotient. Sammy, however, was unimpressed.

Friday, October 17, 2008

Saffron Chicken Risotto


Our first recipe — this is exciting. Tonight we made an adaptation of Cooking Light's 'Seafood Risotto.' We substituted chicken for the seafood, and white wine (a local one, from Williamsburg Winery) for the clam juice. We also left out the tomatoes. Overall, we were really impressed with how quickly this dish came together and how elegantly it turned out, considering that it only used pantry ingredients we already had on hand. Perfect for a Friday night!

Ingredients:
  • 2 tsp. butter
  • 1/4 c. chopped shallots (or sweet onion), finely chopped
  • 1/8 tsp. saffron threads
  • 1/2 c. Arborio rice
  • 1 tbsp. lemon juice (approximately the juice of one half lemon)
  • 2 c. chicken broth
  • 1 c. white wine (we used Williamsburg Winery Governor's White)
  • 1/2 lb. chicken breasts, thin-sliced
  • 2 tbsp. whipping cream
Instructions
  1. Bring chicken broth and wine to a simmer (but not a boil!) in a sauce pan.
  2. Season, then brown chicken in a grill pan, electric grill or regular grill. Remove and slice into bite-size pieces.
  3. Melt the butter in a skillet over medium heat.
  4. Add the shallots to the skillet, soften — about 2 minutes.
  5. Add rice and saffron threads, stirring continuously. Cook for about 15 seconds.
  6. Add lemon juice, stirring continuously. Cook about 30 seconds.
  7. Add broth and wine mixture, 1/2 c. at a time, allowing all moisture to be absorbed between additions. This should take about 30 minutes for all liquid to be added.
  8. Add chicken to rice mixture and stir until chicken is warm throughout, about 2 minutes.
  9. Remove mixture from heat, and stir in whipping cream.
  10. Plate and serve immediately. Sprinkle with fresh parsley as garnish, if desired.
This recipe would work well with any additions in the final stage of cooking. You could add any leftover vegetables or meat that you had available instead of the chicken. The saffron, wine, and lemon provide a nice balance of fruity and savory flavors, so lightly seasoned things would probably work best.

Overall, we were quite pleased with how this recipe turned out. A note of caution: we're not always careful about measuring out all the ingredients before beginning to cook, but this recipe demands it. You do not have an extra hand available to measure ingredients as the risotto requires continuous stirring.

Jim thought this was an excellent recipe and wants to add it to our regular repertoire. Sammy, however, was unimpressed.

Wednesday, October 15, 2008

Our first post: Introductions


I'm Jane; I live outside of DC with Jim and our cat Sammy. Jim and I are both reluctant urbanites. We don't know about Sammy, he might love it here — he certainly loves watching the squirrels.

Here we are, stuck in the city…traffic, neighbors, and not enough soil to grow a proper basil plant, much less a garden. But we’re still trying to do things the fresh, homemade, from-scratch way — and satisfy our taste for the unusual.

You’ll also get to meet the mascot for this blog: our cat, Sammy.